XML Editor
Last Updated: June 2026 | Version: 1.10.0
The XML Editor is the main feature of FreeXmlToolkit. It provides a powerful and easy-to-use interface for working with XML files.
Overview
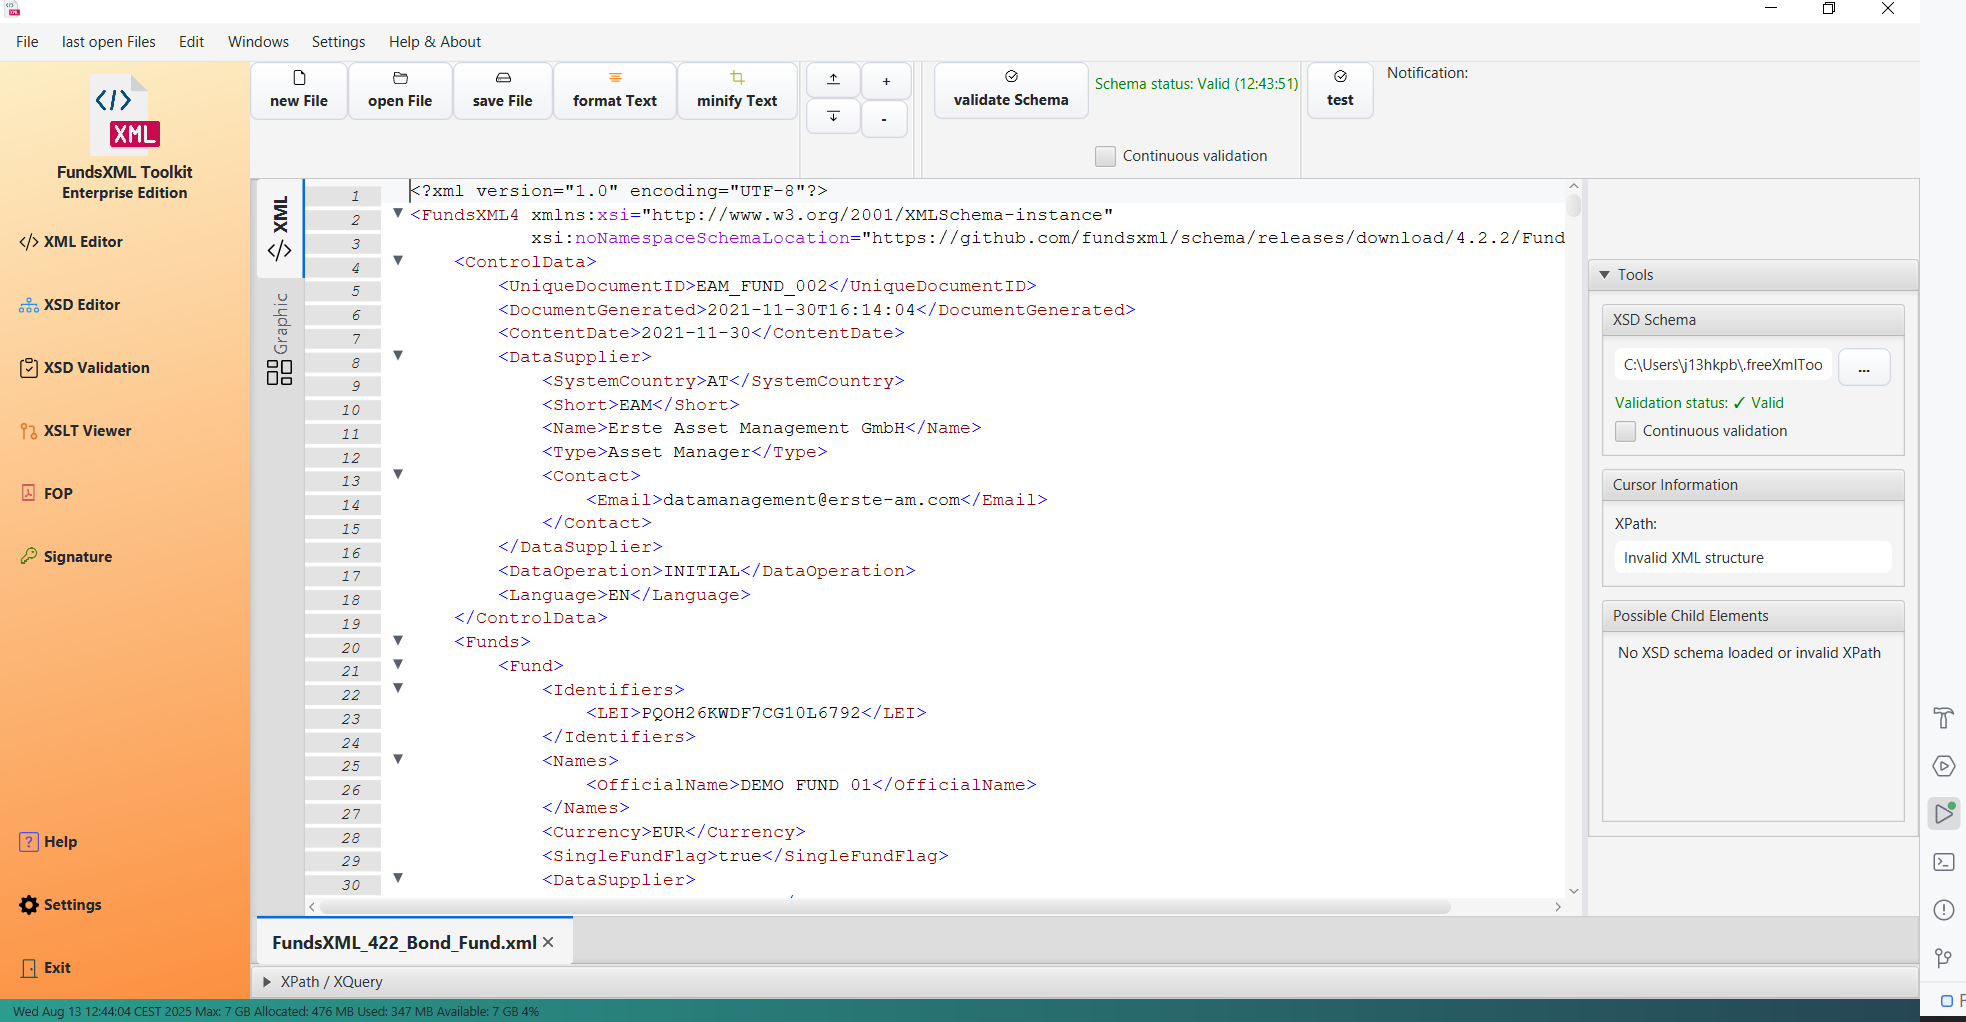 The XML Editor in text mode with syntax highlighting
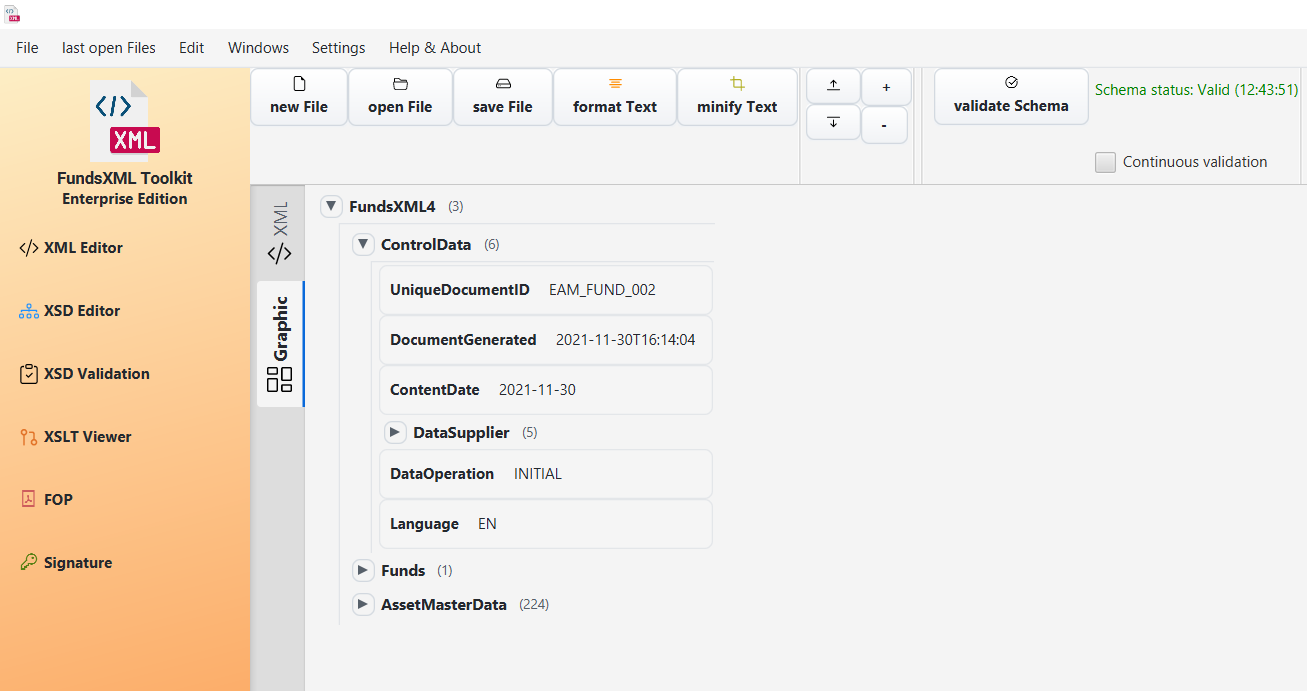 The XML Editor in the Graphic view (grid) for structured editing
Toolbar
| Button | Shortcut | Description |
|---|---|---|
| New | Ctrl+N | Create new XML document |
| Open | Ctrl+O | Open XML file |
| Save | Ctrl+S | Save current file |
| Save As | Ctrl+Shift+S | Save with new name |
| Save All | - | Save all open document tabs at once |
| Recent | Ctrl+Shift+R | Open recent files menu |
| Undo | Ctrl+Z | Undo last change |
| Redo | Ctrl+Y | Redo undone change |
| Add Favorite | Ctrl+D | Add file to favorites |
| Favorites | Ctrl+Shift+D | Toggle favorites panel |
| Format | Ctrl+Alt+F | Pretty print XML |
| Validate | F5 | Validate XML |
| Convert | Ctrl+E | XML/Excel/CSV converter |
| Query | Ctrl+Q | Run XPath/XQuery |
| Templates | Ctrl+T | Open template manager |
| Generator | Ctrl+G | Schema generator |
| XSLT Dev | Ctrl+Shift+T | XSLT development panel |
| Properties | Ctrl+P | Toggle properties panel |
| XPath | Ctrl+Q | Toggle XPath panel |
| Help | F1 | Show help |
Working with Files
Opening and Saving Files
 File toolbar with Open, Save, and New buttons
- Open Files: Click "Open" or use
Ctrl+Oto browse for XML files - Save Files: Click "Save" or use
Ctrl+Sto save changes to the current file - Save As: Use
Ctrl+Shift+Sto save the current file with a new name - Save All: Click "Save All" to save every open document tab at once (untitled tabs prompt you for a file name)
- Create New: Click "New" to start with an empty XML document
- Drag & Drop: Drag files from your file explorer into the editor
- Recent Files: Quick access to recently opened files
Multiple Files
Open multiple XML files in separate tabs. Each tab shows the file name and indicates unsaved changes with an asterisk (*).
Editing Modes
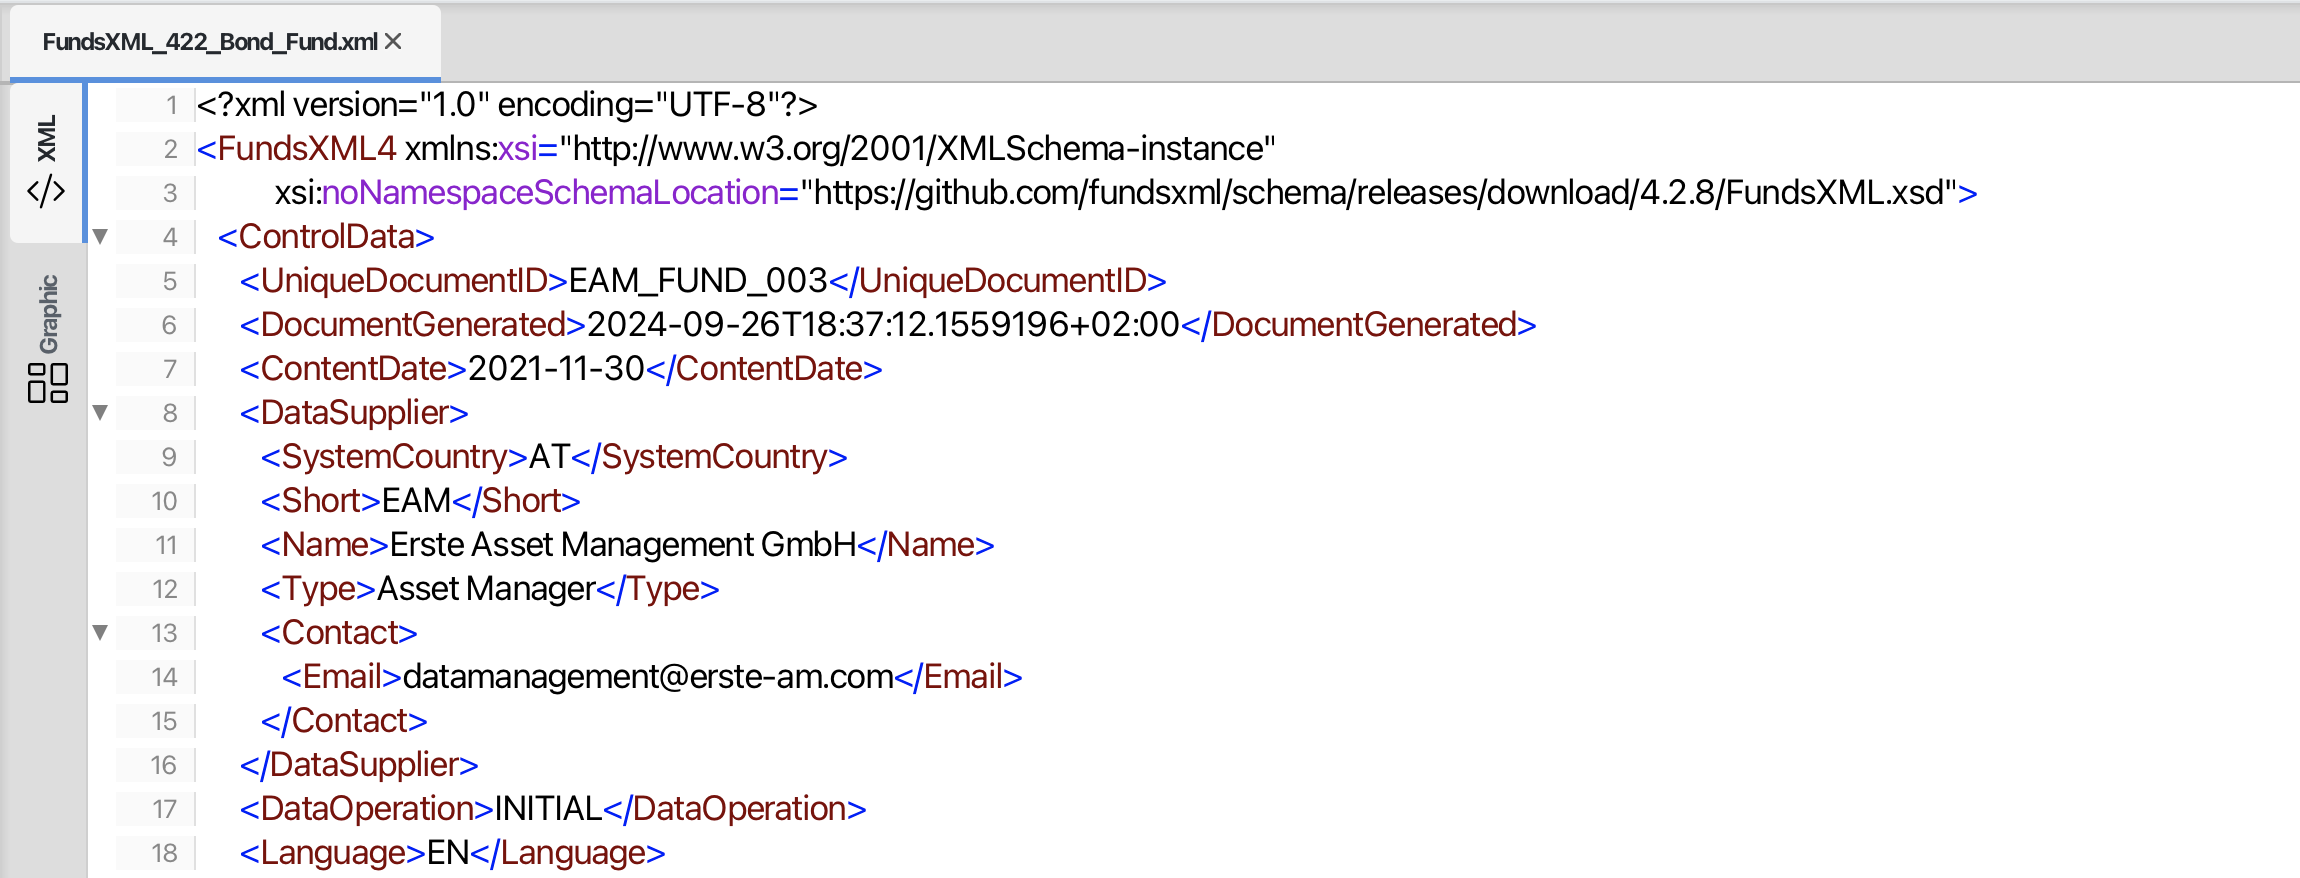
Text Mode
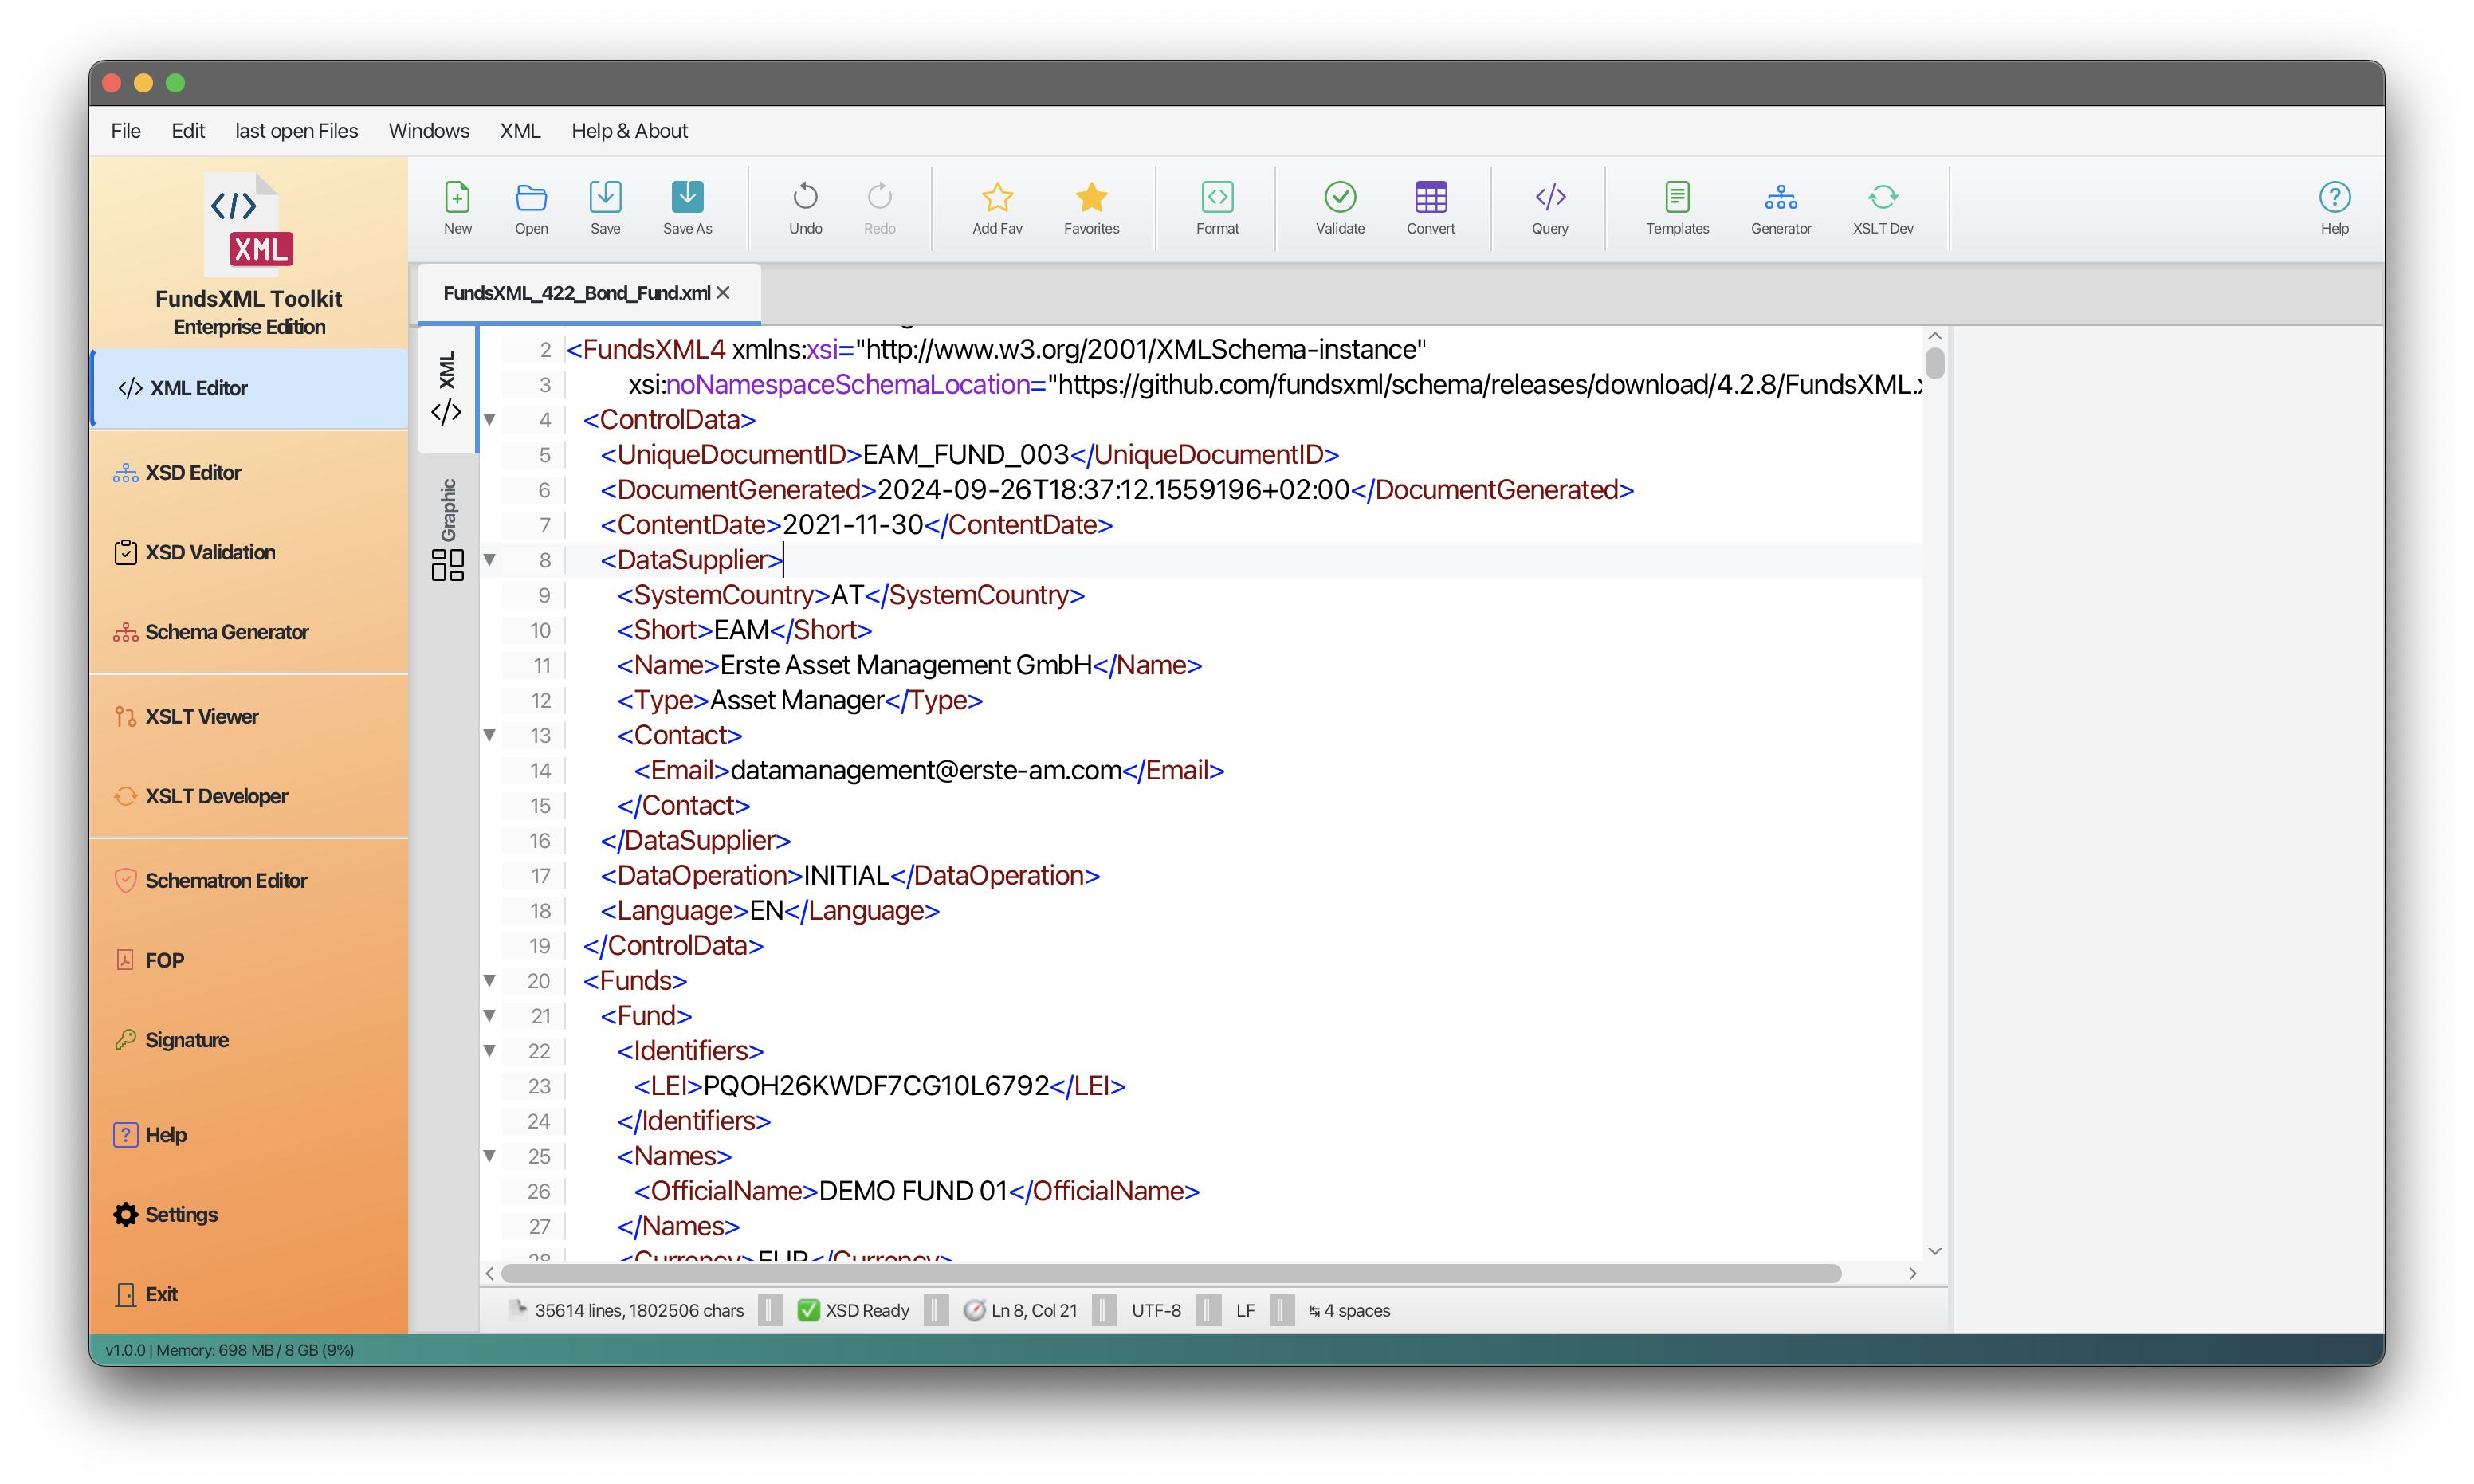 Text editor with syntax highlighting
The text editor provides:
- Syntax Highlighting: XML elements, attributes, and values are color-coded
- Line Numbers: Every line is numbered for easy reference
- Code Folding: Click arrows to collapse or expand sections
- Auto-Completion: Type
<to see suggestions for valid elements - Error Highlighting: Invalid XML is highlighted in red
- Edit Properties: Move the text cursor into an element and edit its properties in the Properties inspector - see Properties Inspector
Tree View
 Tree view showing XML structure
- See your XML document as a hierarchical tree
- Click any node (element, text, comment, CDATA, or processing instruction) to select it
- Edit the selected node's properties in the Properties inspector - see Properties Inspector
- Right-click for context menu options
Graphic Mode (Grid)
Updated in June 2026 - The separate "Grid" view mode has been merged into the Graphic view. For XML documents, the Graphic view shows the editable XMLSpy-style grid.
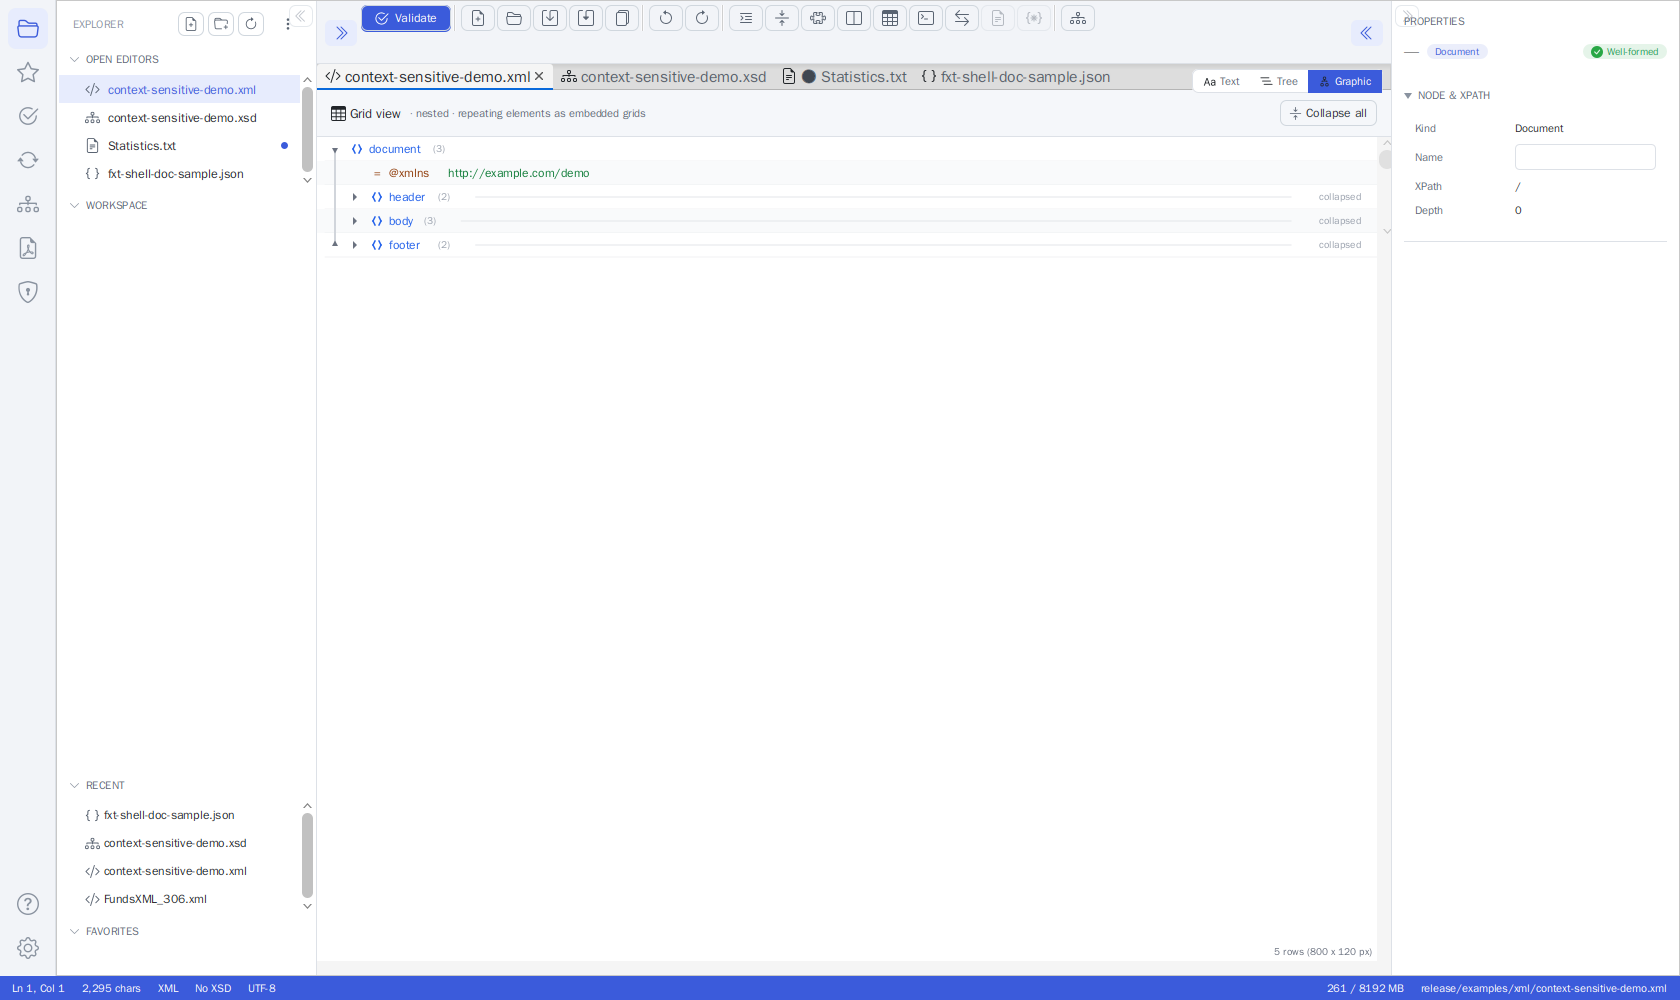 An XML document in the Graphic view (XMLSpy-style grid editing)
The grid provides:
- Table View: Edit XML data in a spreadsheet-like interface
- Header Strip: A header at the top ("Grid view · nested · repeating elements as embedded grids") with a Collapse all button that folds every container at once
- Value Markers: Rows with a simple value are marked with
{}; collapsed containers show a "collapsed" hint - Direct Cell Editing: Click cells to edit values directly
- Easy Navigation: Move through the document using arrow keys
- Sorting: Sort data by clicking column headers
- Structural Editing: Add, delete, and move nodes through the right-click context menu
- Edit Properties: Select a row to edit its properties in the Properties inspector - see Properties Inspector
Properties Inspector
Updated in v1.10 - The Properties inspector now lets you view and edit a node's properties in all three XML views - Text, Tree, and Graphic. Previously, property editing was only available in the grid.
The Properties inspector shows the details of the currently selected node and lets you change them. Toggle the panel with Ctrl+P (or the Properties toolbar button); it appears on the right side of the editor.
Screenshot note: The existing XML editor screenshots predate this change. The Properties inspector now appears alongside the Text, Tree, and Graphic views (not only the grid).
Selecting a Node
How you select a node depends on the active view:
- Text view - Move the text caret into an element. That element is selected automatically and shown in the inspector. If the caret is not inside a well-formed element, the inspector shows a read-only view with the node's name and XPath.
- Tree view - Click a node in the tree (element, text, comment, CDATA, or processing instruction).
- Graphic view - Select a row in the grid.
What You Can Edit
Depending on the node type, the inspector lets you edit:
- Element name and its namespace (prefix and URI)
- Attributes - add, rename, and remove them
- Text content of leaf elements
- Text of comments, CDATA sections, and processing instructions
Your edits are written straight back to the document, so the source text always stays in sync. In the Text view, edits are applied as a minimal change that keeps your caret and scroll position in place.
Read-Only Schema Hints
When the XML file is bound to an XSD schema, the inspector also shows helpful, read-only information for the selected element:
- The schema type derived from the XSD
- The element's documentation
- Lists of valid child elements and example values
These hints help you fill in correct content but cannot be edited from the inspector.
Shared Across Views
All three views share a single in-memory model for each open document. This means your edits - and your full Undo / Redo history - are preserved when you switch between the Text, Tree, and Graphic views.
Note: Adding, deleting, or moving whole nodes (structural editing) is done in the Graphic view (the grid) via its right-click context menu. The Text and Tree views provide property editing through the inspector.
Search (Find)
Updated in v1.10 - Search now works in the Graphic view too, not just the text view.
Press Ctrl+F to find text in your document. A Find / Replace dialog opens where you type your search term and use the up and down arrows (Find Previous / Find Next) to move between matches; the search wraps around at the end.
Search works in both views (case-insensitive):
- Text view - Matches are highlighted in the source. Replace is available here.
- Graphic view - The search looks through element names, attribute names, and values across the whole document. The editor jumps to each matching node, auto-expanding collapsed parent nodes, selecting the matching row, and scrolling it into view. (Replace is not available in the Graphic view.)
If you switch between the Text and Graphic sub-tabs while the dialog is open, the search re-targets the active view automatically.
Learn more: Search (Find)
Auto-Completion (IntelliSense)
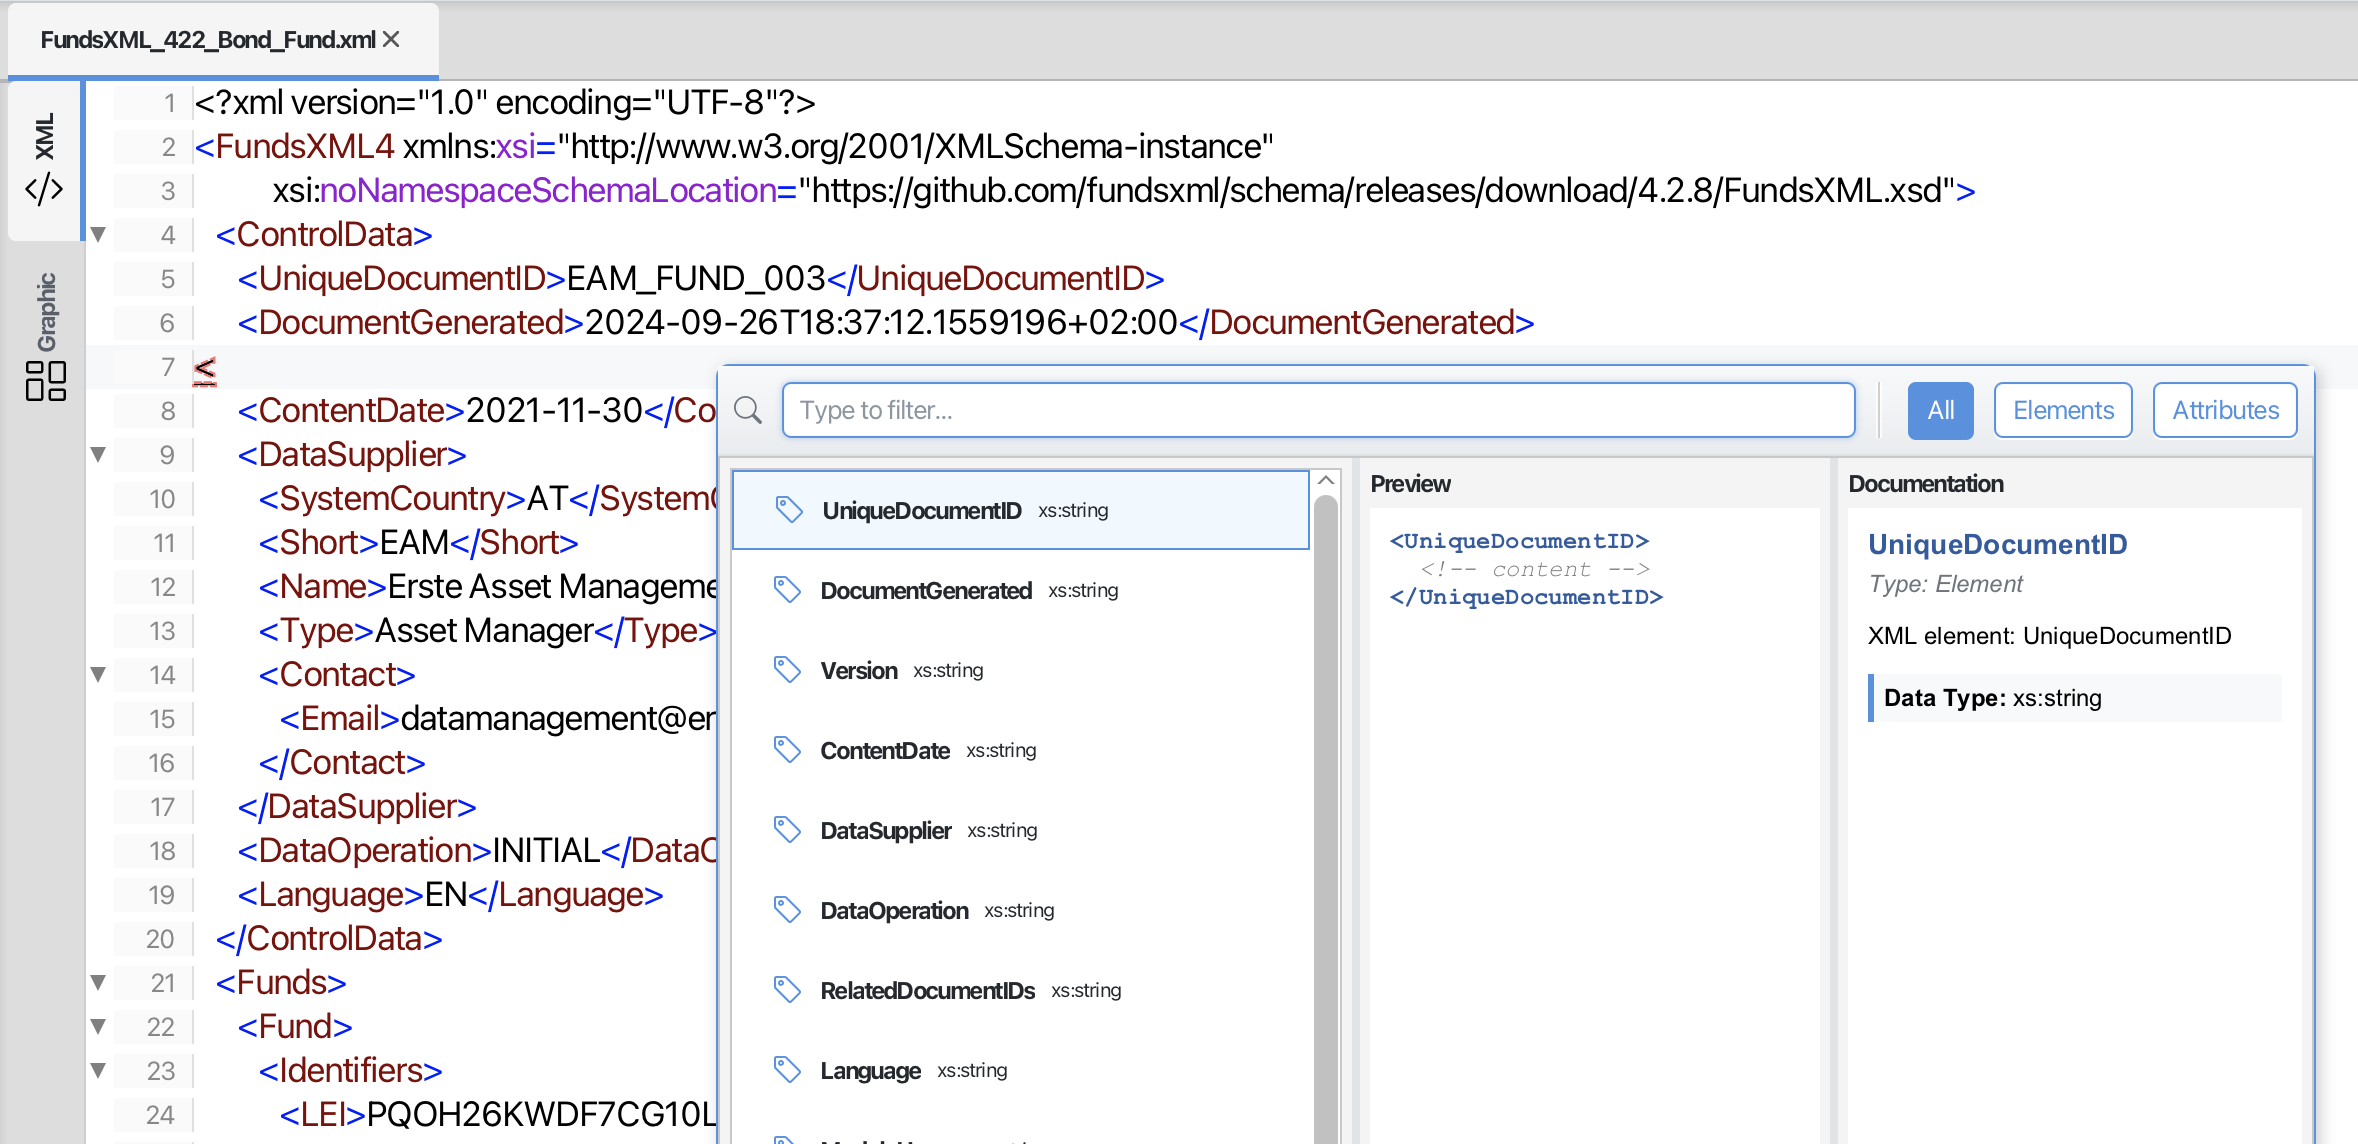 Auto-completion popup showing element suggestions
The editor automatically suggests valid elements and attributes based on your XSD schema:
- Type
<to see a list of valid child elements - Navigate through suggestions with arrow keys
- Press Enter to insert the selected element
- Press Escape to close the suggestions
The suggestions are context-sensitive - only elements valid at your current position are shown.
Learn more: Auto-Completion Guide
Binding an XSD Schema
New in June 2026 - Bind an XSD to the active document directly from the editor.
If your XML does not reference its schema (or you want to use a different one), you can bind an XSD by hand:
- Click the "No XSD" indicator in the status bar (it shows "XSD: name" once a schema is bound), or use the toolbar's Set XSD Schema… action.
- Choose an
.xsdfile.
The binding applies to the active document and drives both features at once:
- IntelliSense - auto-completion suggests the elements and attributes the schema allows.
- Schema validation - Validate (F5) and continuous validation check against the bound XSD.
Formatting Tools
Pretty Print
 Before pretty print
Click Format or use Ctrl+Alt+F to format your XML with proper indentation.
 After pretty print
Validation
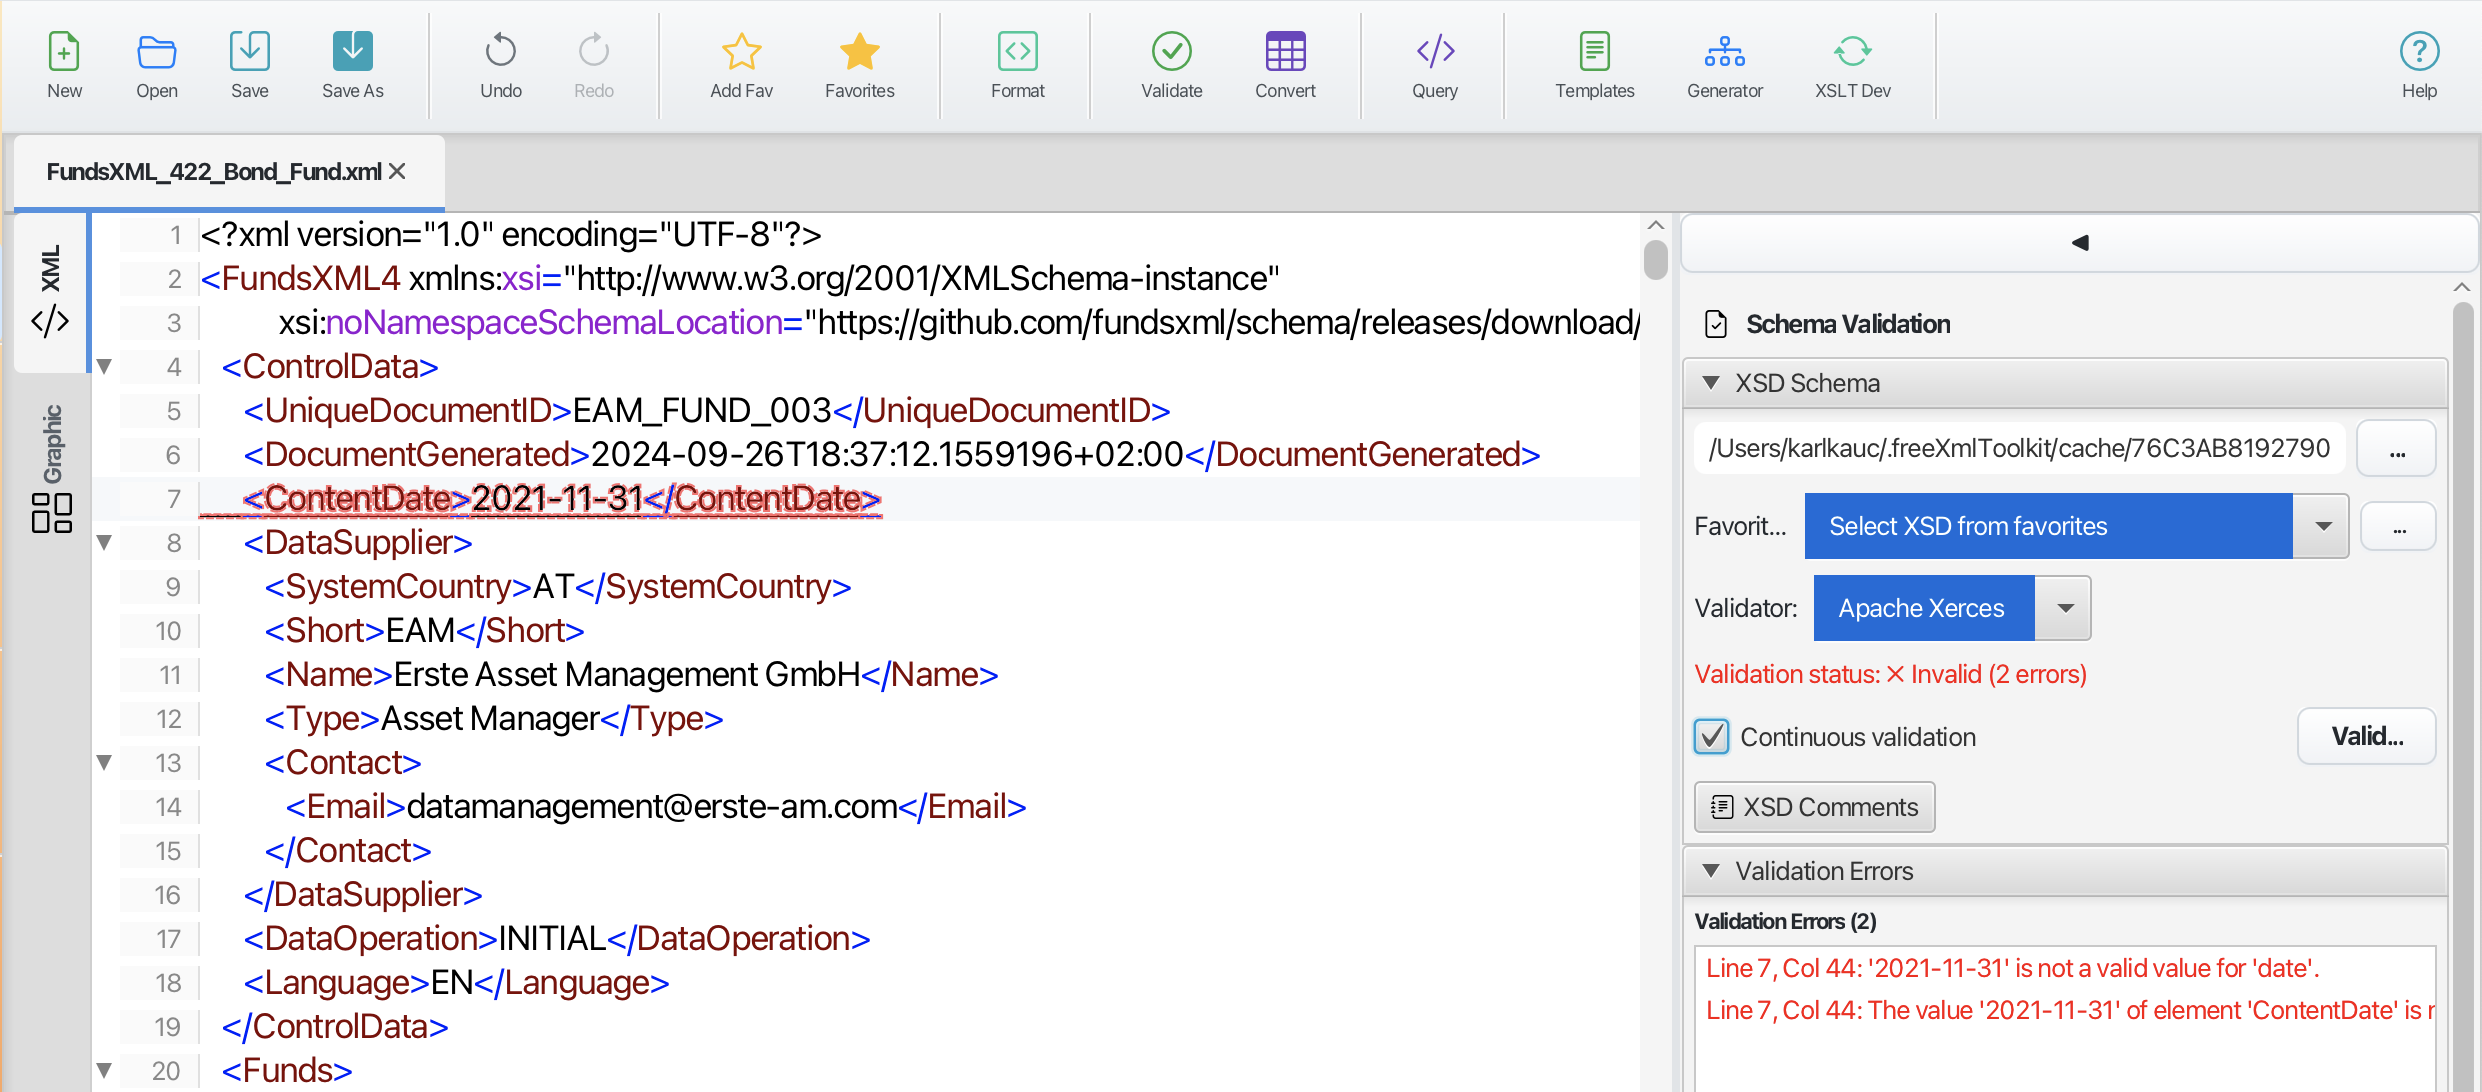 Validation panel showing errors and warnings
How to Validate
- Click Validate or press F5
- If your XML references a schema, it's loaded automatically - or bind one yourself, see Binding an XSD Schema
- Errors and warnings appear in the validation panel
- Click an error to jump to the problem location
Supported Validation Methods
| Method | Description |
|---|---|
| Well-Formed Check | Ensures basic XML syntax is correct |
| XSD Validation | Validates against XML Schema files |
| Schematron | Validates against business rules |
Supported Schema Formats
| Format | Support |
|---|---|
| XSD (XML Schema) | Full support (1.0 and 1.1) |
| Schematron | Full support |
| DTD | Not supported |
| RelaxNG | Not supported |
XPath and XQuery
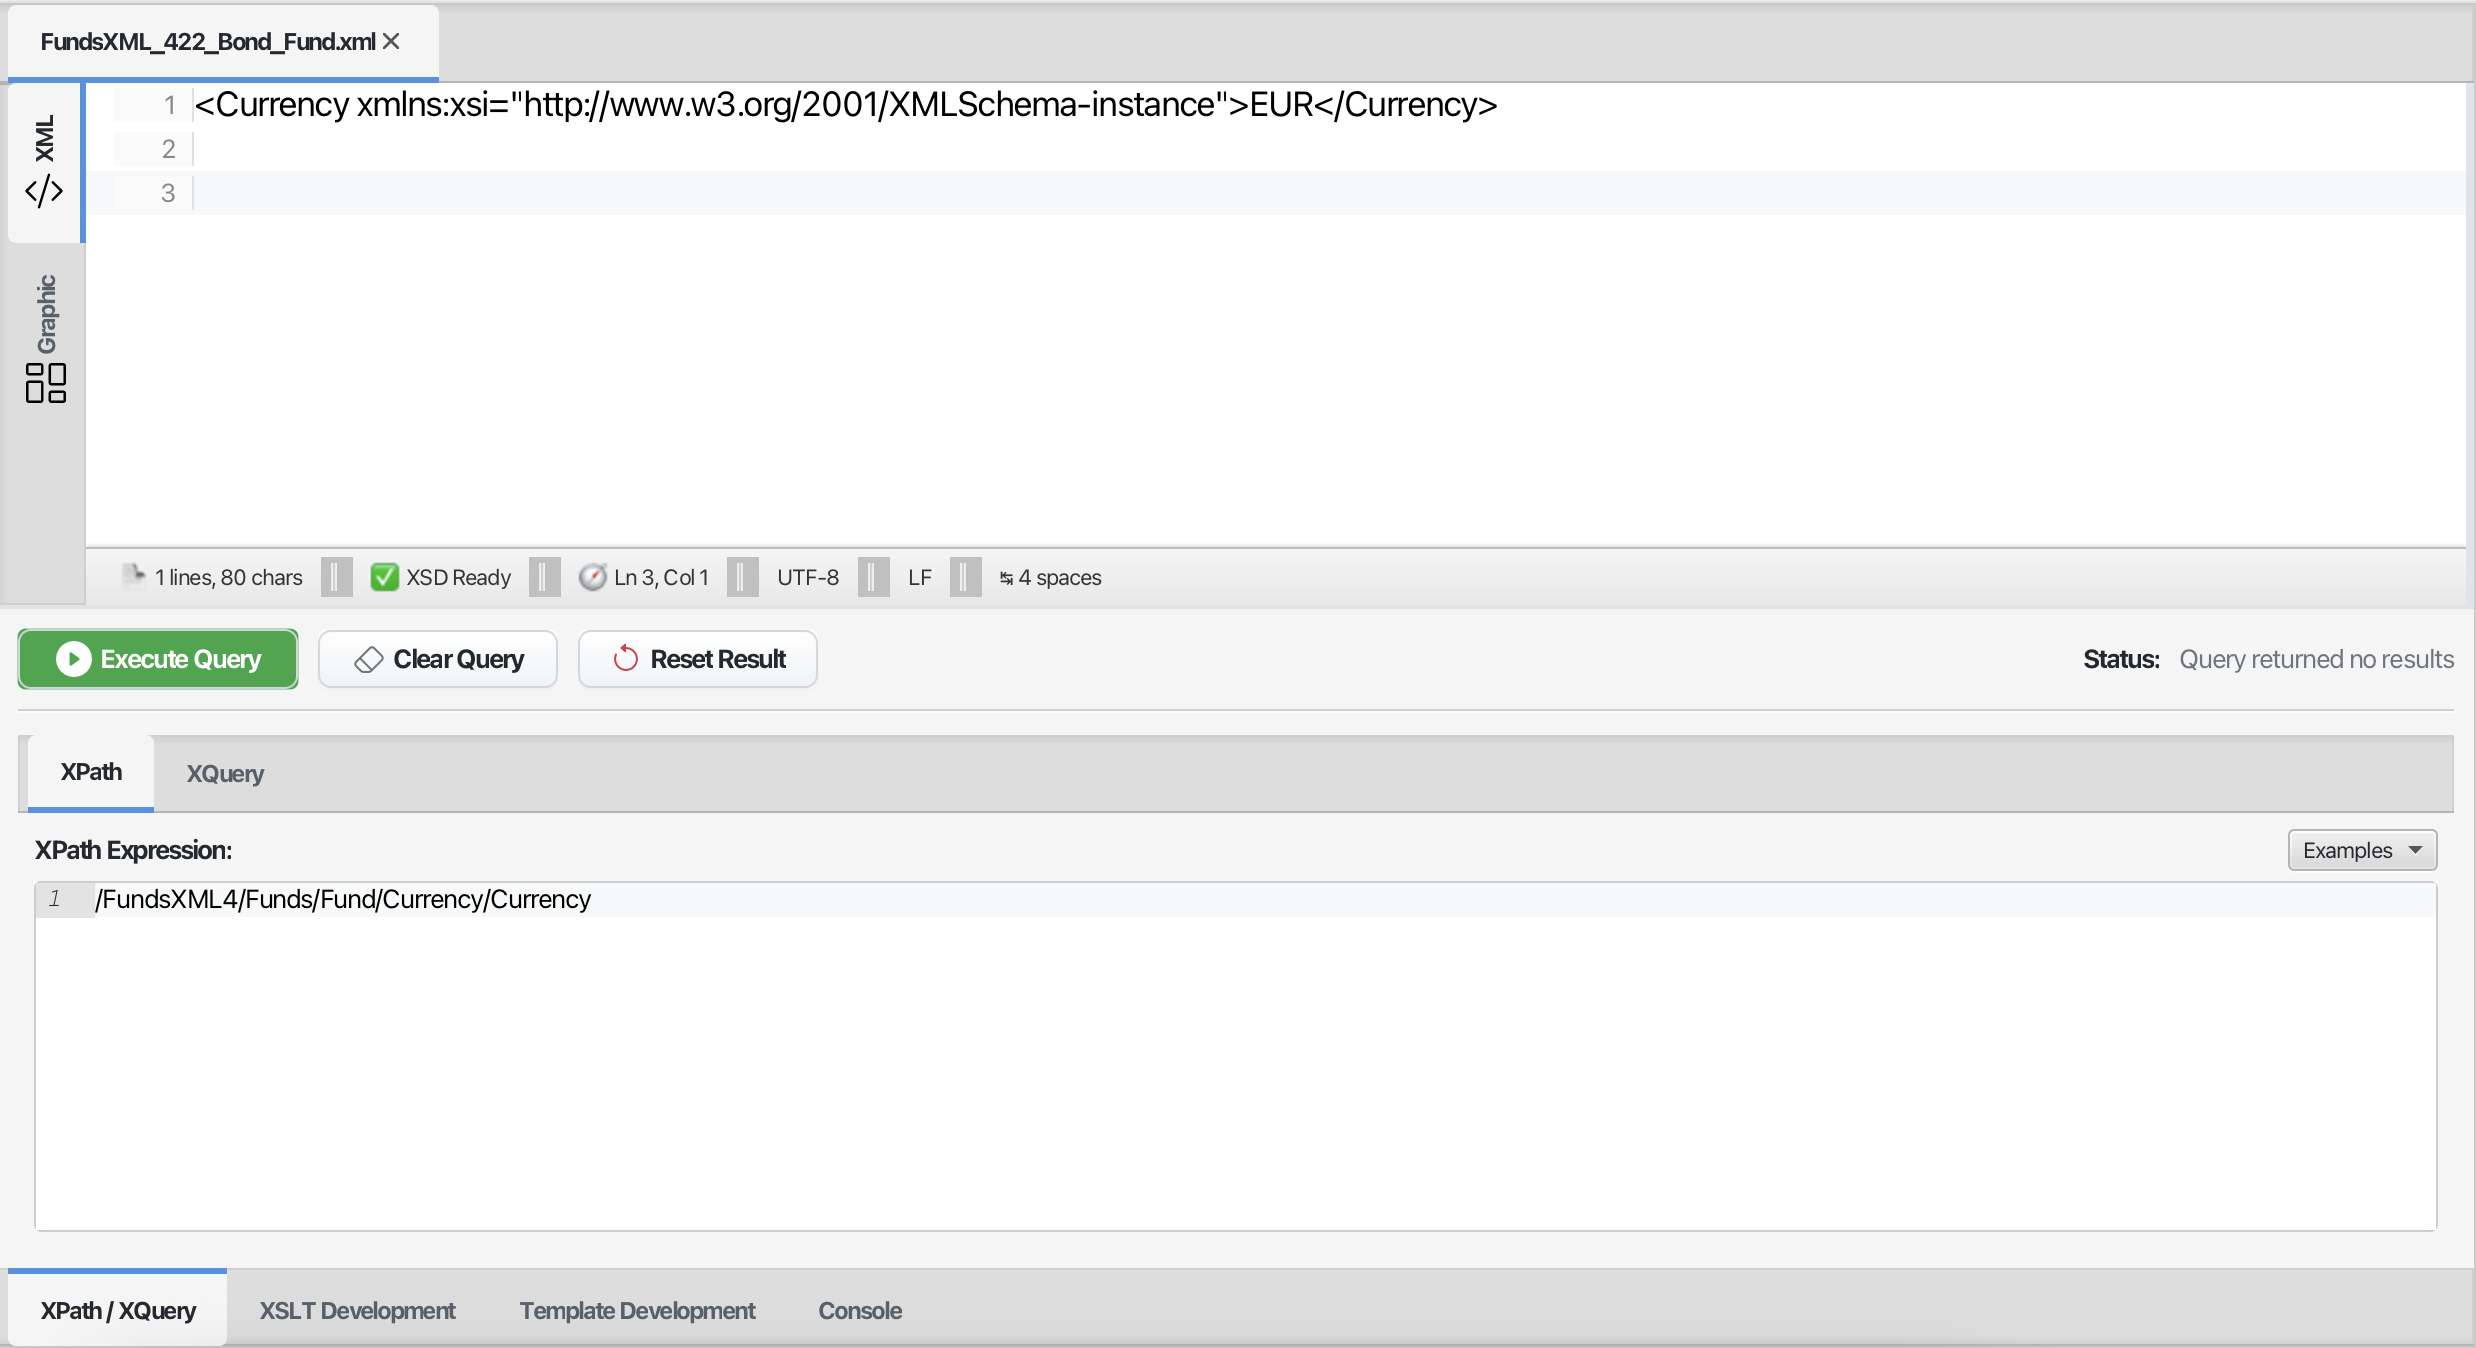 XPath panel with query input and results
Use XPath and XQuery to find and extract data from your XML documents.
Using the XPath/XQuery Panel
- Toggle the panel with Ctrl+Q or click the XPath button
- Choose XPath or XQuery tab
- Enter your expression
- Click Execute Query
- View results in the editor (matching nodes are highlighted)
XPath Examples
| Expression | Description |
|---|---|
//element |
Find all elements named "element" |
//element/@attr |
Find all "attr" attributes on "element" |
/root/child[1] |
Find the first child of root |
count(//item) |
Count all item elements |
//text() |
Find all text nodes |
XQuery Examples
| Expression | Description |
|---|---|
for $x in //item return $x |
Return all items |
for $x in //item where $x/@id='1' return $x/name |
Filter and return |
Use the Examples menu for quick insertion of common expressions.
XML/Excel/CSV Converter
Click Convert (Ctrl+E) to open the converter dialog:
- XML to Excel: Export XML data to Excel spreadsheet
- XML to CSV: Export XML data to CSV file
- Excel to XML: Import Excel data as XML
- CSV to XML: Import CSV data as XML
Templates
Click Templates (Ctrl+T) to access the template manager:
- Insert pre-defined XML snippets
- Create your own templates
- Organize templates by category
Learn more: Template Management
Schema Generator
Click Generator (Ctrl+G) to generate an XSD schema from your XML:
- Analyze XML structure
- Generate matching XSD schema
- Customize type detection
Favorites
Save frequently used files for quick access:
- Add Favorite (Ctrl+D) - Save current file to favorites
- Favorites (Ctrl+Shift+D) - Show/hide favorites panel
The favorites panel appears on the right side.
Learn more: Favorites System
Keyboard Shortcuts
| Shortcut | Action |
|---|---|
| Ctrl+N | New file |
| Ctrl+O | Open file |
| Ctrl+S | Save file |
| Ctrl+Shift+S | Save As |
| Ctrl+W | Close tab |
| Ctrl+Z | Undo |
| Ctrl+Y | Redo |
| Ctrl+F | Find |
| Ctrl+H | Replace |
| Ctrl+G | Go to line |
| Ctrl+D | Add to favorites |
| Ctrl+Shift+D | Toggle favorites |
| Ctrl+Alt+F | Format/Pretty Print |
| Ctrl+Q | Toggle XPath panel |
| Ctrl+E | XML/Excel converter |
| Ctrl+T | Templates |
| Ctrl++ | Zoom in |
| Ctrl+- | Zoom out |
| F5 | Validate |
| F1 | Help |
< |
Open auto-completion |
Tips
- Multiple Files: Open multiple XML files in different tabs
- Remember Location: The editor remembers the last folder you used
- Font Size: Use
Ctrl++andCtrl+-to adjust font size - Quick Validation: Errors are highlighted as you type
- Drag & Drop: Drag files directly into the editor window
- Recent Files: Use the Recent menu for quick access
Navigation
| Previous | Home | Next |
|---|---|---|
| Home | Home | XML Editor Features |
All Pages: Unified Shell | XML Editor | XML Features | JSON Editor | XSD Tools | Profiled XML Generation | XSD Validation | XSLT Viewer | XSLT Developer | FOP/PDF | Signatures | IntelliSense | Schematron | FundsXML Extensions | Favorites | Templates | Tech Stack | Security | Licenses